 How to purchase a VPS from Digital Ocean
- Register an account at the Digital Ocean website using this link and you will receive a $100 to $200 starting credit.
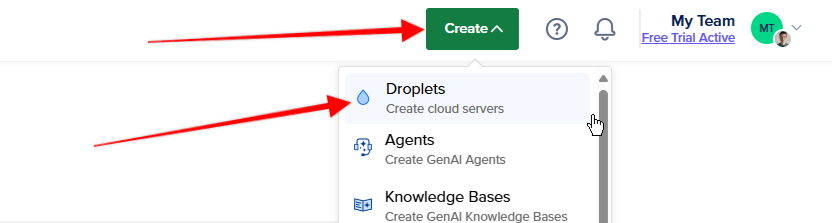
- Once you login to Digital Ocean, click on the big green Create button on the top right of the screen and press Droplets.

- Select your Region, considering which will be close to you and your customers.

- Choose your operating system, ensuring it is listed in our supported operating systems, we recommend the latest Debian release.

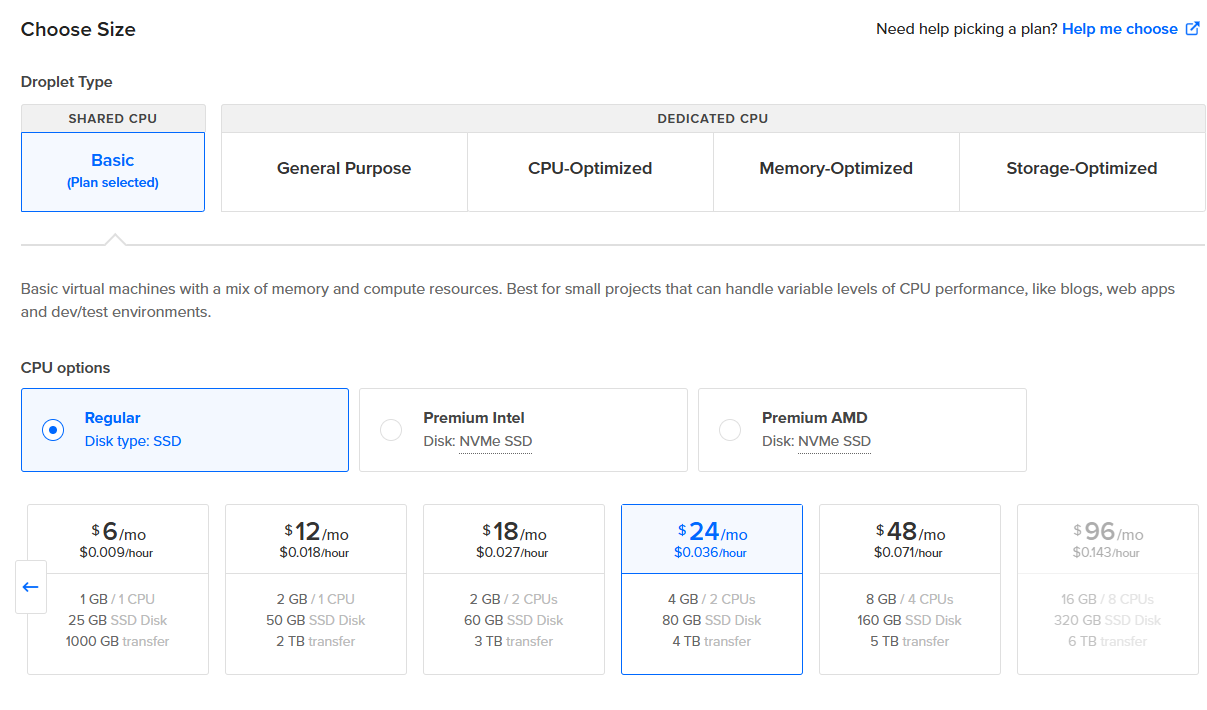
- We recommend selecting the Shared CPU – Basic option, from there select the instance size of your preference.

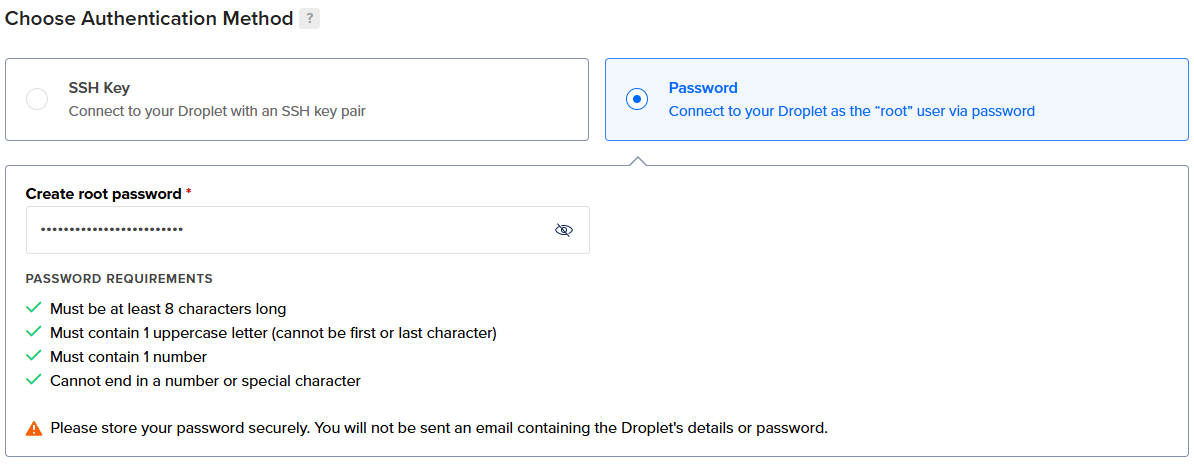
- Set a secure Root Password. Note the root password down as it will be needed for installation and administration.

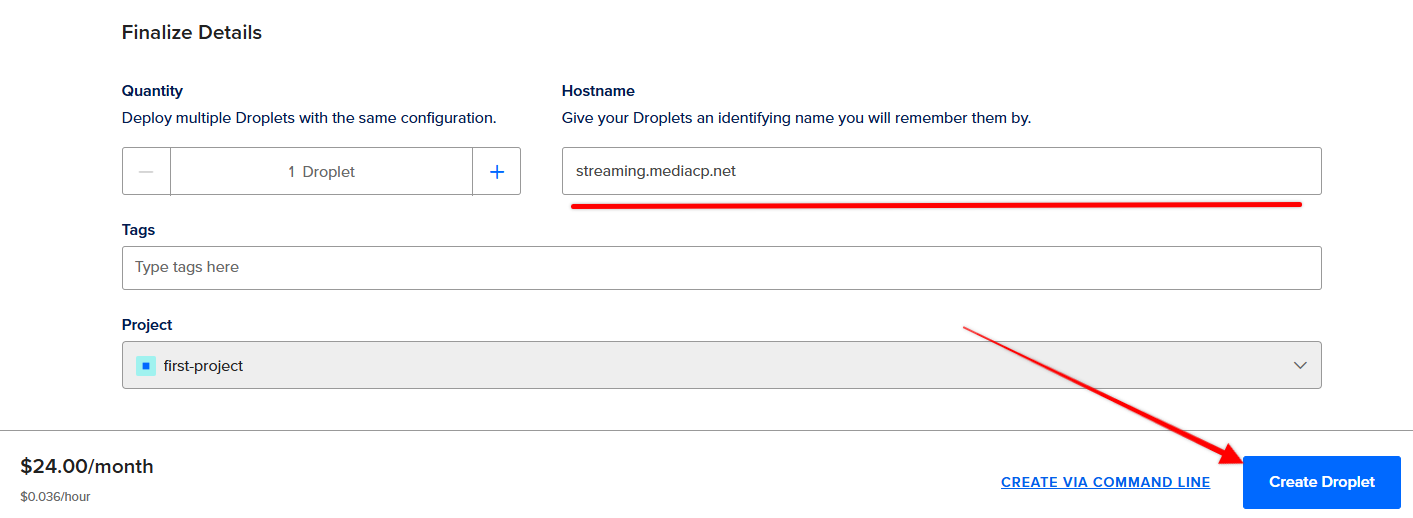
- enter in the domain name that you will be using (in our example streaming.mediacp.net), then you can press the Create Droplet button.

- The VPS may take a few minutes before it is ready. Once ready copy the IP address provided to somewhere safe, we’ll be using this to point our domain name to the server.


 How to purchase a VPS from Linode
- Register an account at the Linode website using this link and you will receive a $100 starting credit.
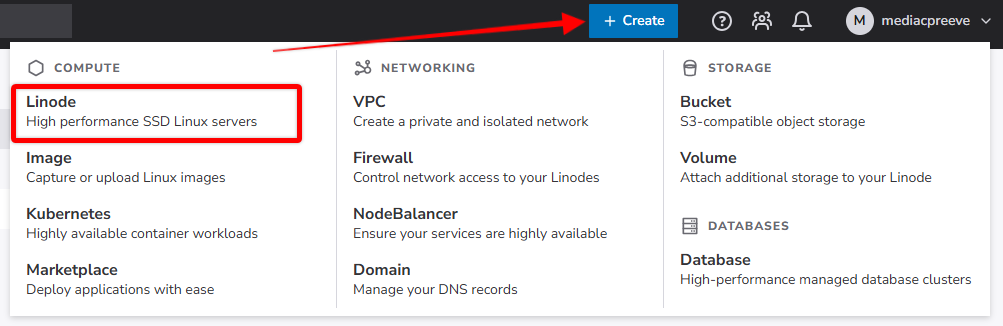
- Once you login to Linode, click on the big blue + Create button on the top right of the screen and press Linode under Compute.

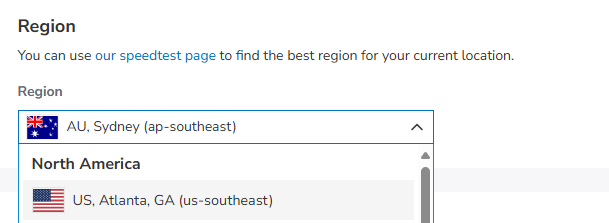
- Select your Region, considering which will be close to you and your customers

- Choose your operating system, ensuring it is listed in our supported operating systems, we recommend the latest Debian release.
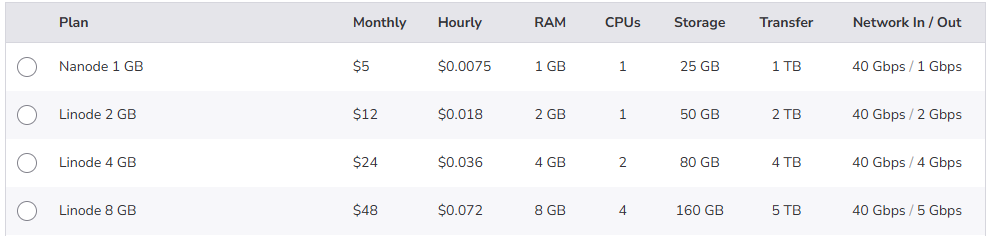
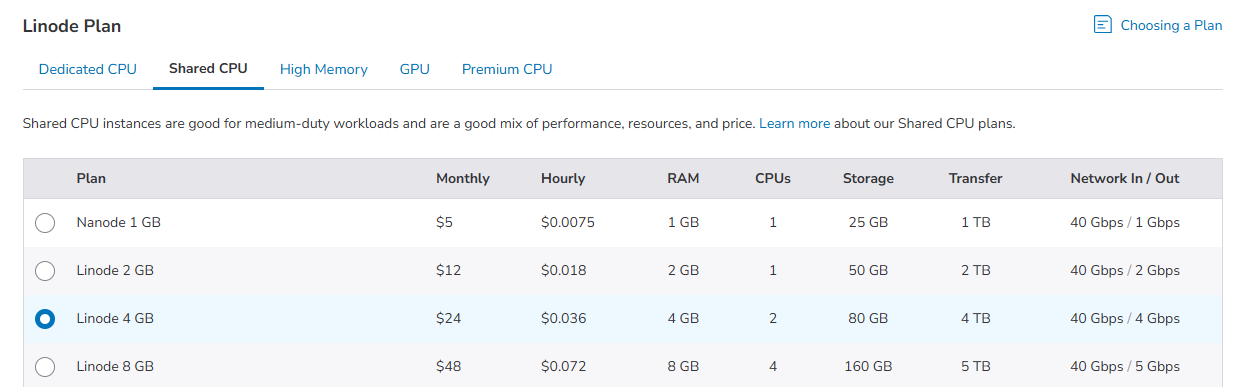
- We recommend selecting the Shared Compute option, from there select the instance size of your preference.

- In the Linode Label field enter in the domain name that you will be using (in our example streaming.mediacp.net) and set a secure Root Password. Note the root password down as it will be needed for installation and administration.

- Finally, then you can press the Create Linode button.

- The VPS may take a few minutes before it is ready. Once ready copy the IP address provided to somewhere safe, we’ll be using this to point our domain name to the server.


 How to purchase a VPS from Vultr
- Register an account at the Vultr website using this link and you will receive a $100 starting credit.
- Once you login to Vultr, click on the big blue plus icon on the right of the screen and press Deploy New Server

- We recommend selecting the Cloud Compute option and directly under this the intel Regular Performance.

- Select your preferred deployment location from the list provided.

- Select the Debian 12 x64 option (our recommended)

- Select the instance size of your preference

- Finally, scroll all the way down the page and you will see “Server Hostname & Label” at the bottom. Enter in the domain name that you will be using (in our examlpe streaming.mediacp.net) then you can press the Deploy button

- The VPS may take a few minutes before it is ready. Once ready copy the IP address provided to somewhere safe, we’ll be using this to point our domain name to the server.

 How to purchase a VPS from Hetzner
- Register an account at the Hetzner website.
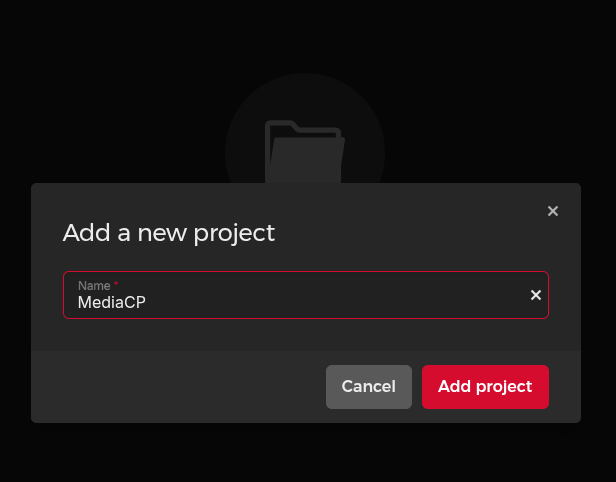
- Once you login to Hetzner, select New Project and set a project name.

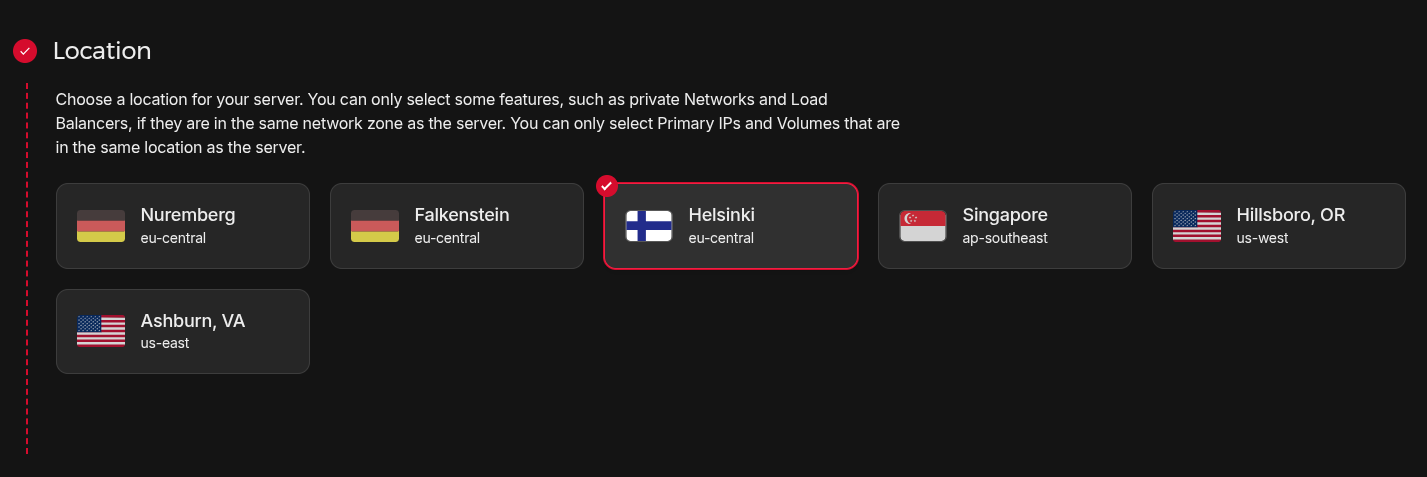
- Select your preferred deployment location from the list provided.

- Select a supported Operating System image, we recommend Debian 12.

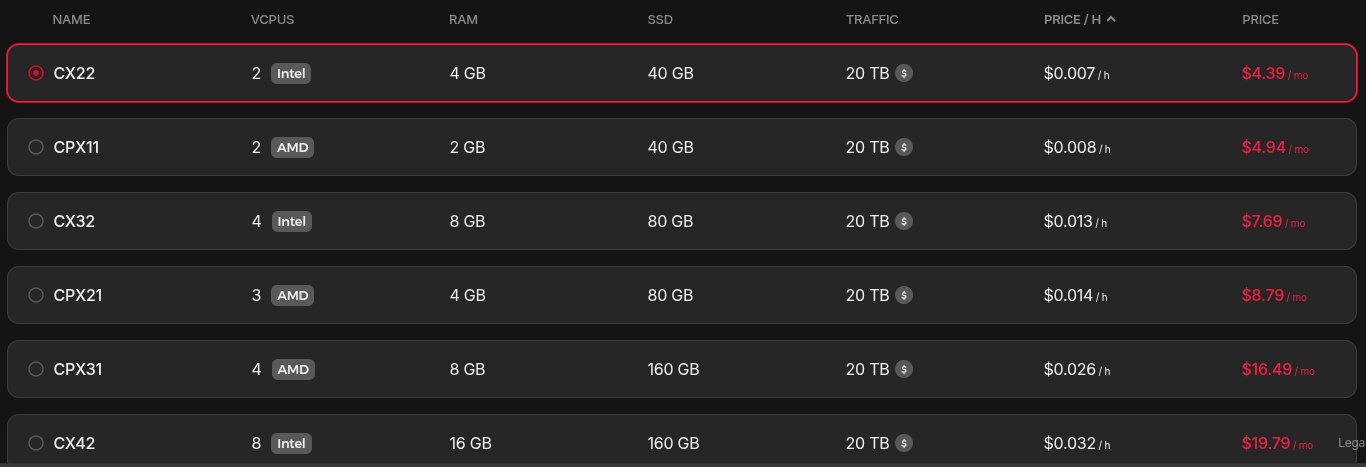
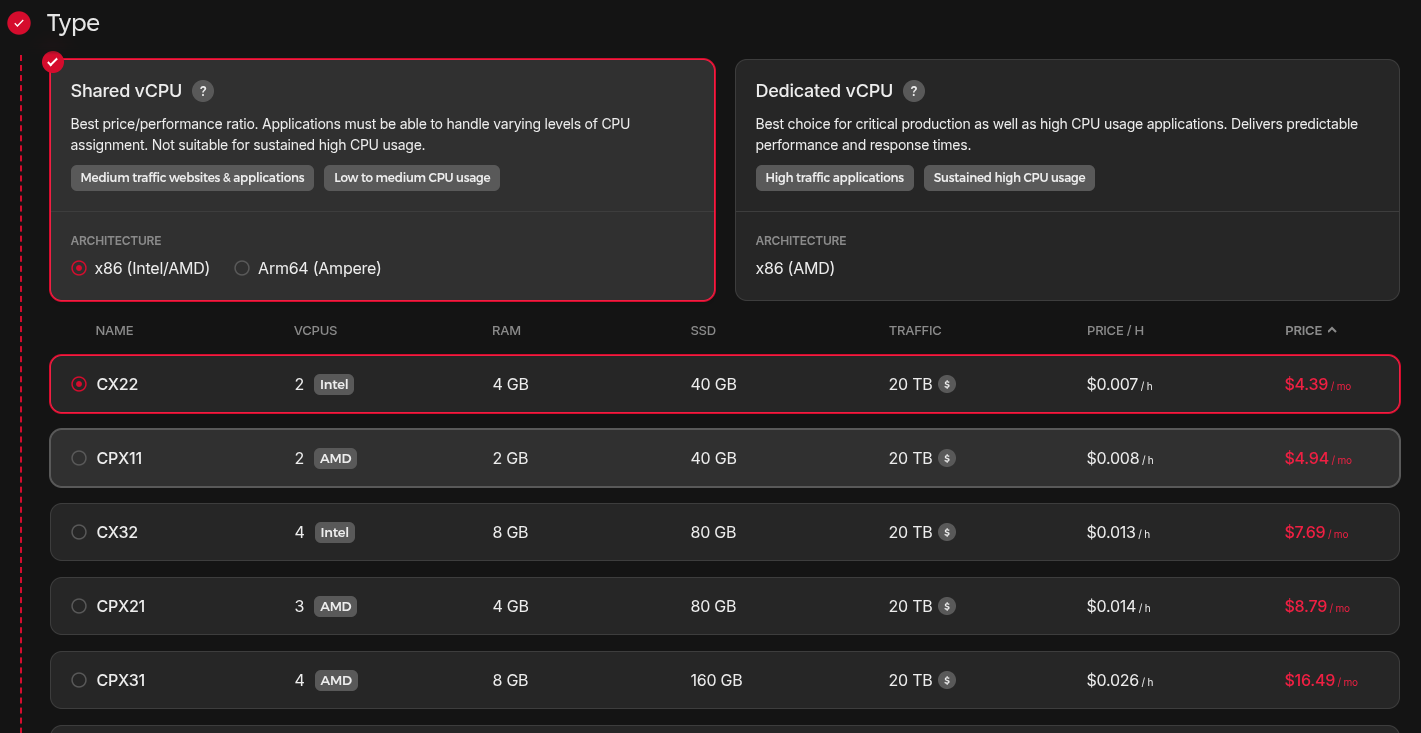
- Set the VPS type. We recommend selecting the Shared vCPU option then x22 or x32.

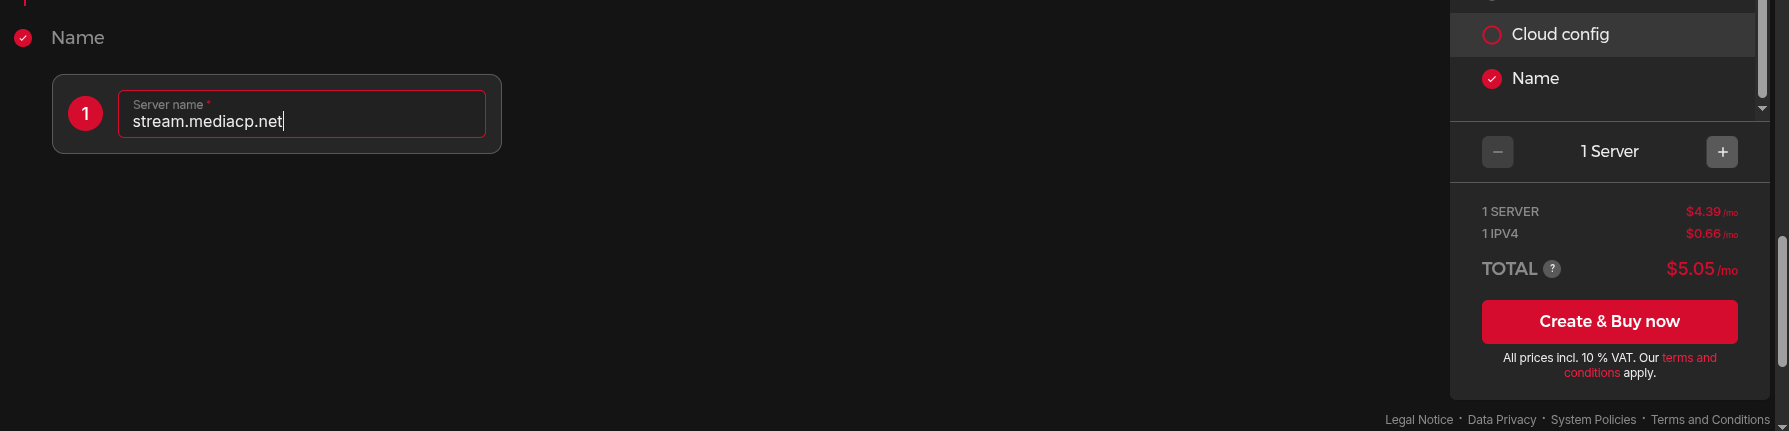
- Finally, scroll all the way down the page and set the Server Name to the domain name that you will be using (in our example streaming.mediacp.net) then you can press the Create & Buy Now button.

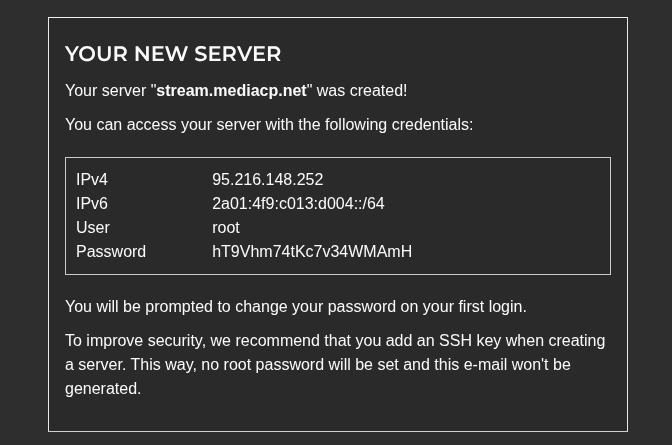
- The VPS may take a few minutes before it is ready. Once ready you will recieve an email with your servers IP address and SSH details. Keep track of this, we’ll be using this to point our domain name to the server and install the Media Control Panel.


Google Cloud is Googles VPS and cloud product center similar to Amazon AWS. Google Cloud offers VPS’s that can be used for the Media Control Panel. For either Audio or Video streaming we recommend starting with the E2 Medium. Keep in mind that it is possible to upgrade to a larger instance at any time so you can start small and upgrade further as required.
How to purchase a VPS from Google
- Register an account at the Google Cloud website using this link and you will receive a $300 starting credit.
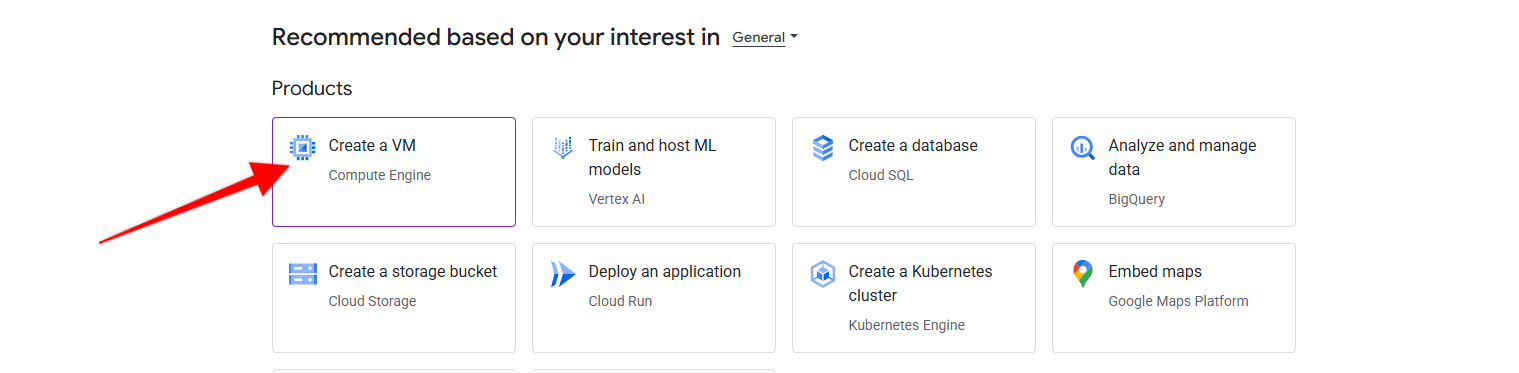
- Once you login to Google Cloud, click on the create a VM button.

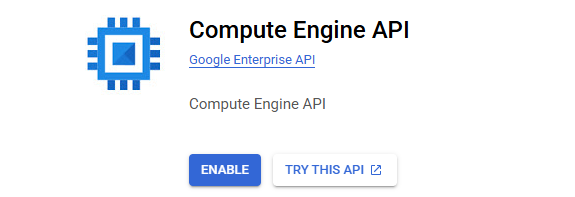
- It will prompt you to enable the Compute Engine API, select Enable.

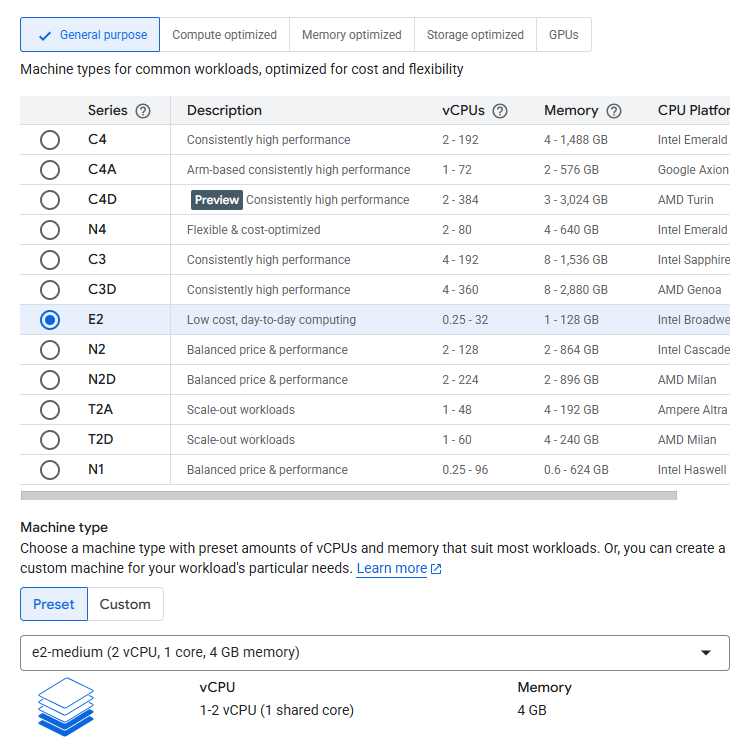
- You will be moved to Create an instance where it should default to E2 Medium which is our default recommendation. You can change the configuration to any of their presets or custom in Machine configuration.

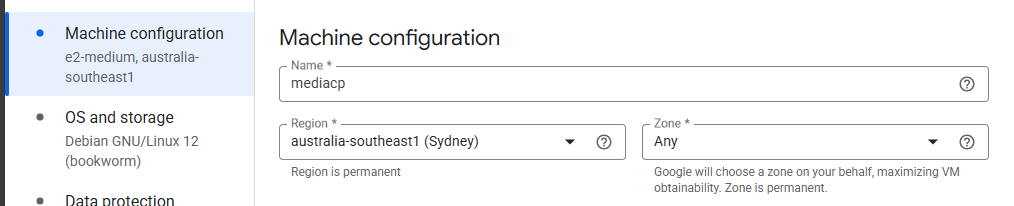
- Set the Name Region and Zone to your preference.

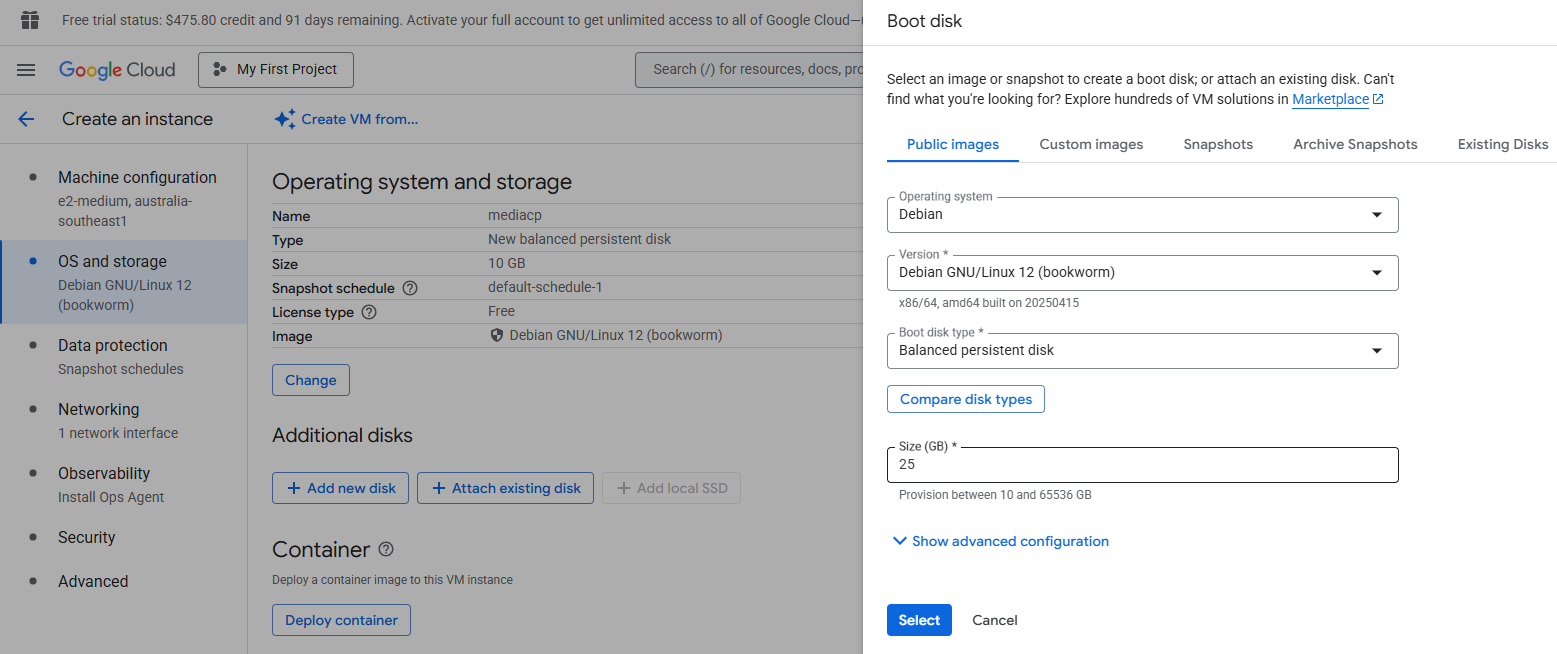
- Select OS and Storage on the left navigation bar, then Change to increase the disk size and choose your operating system. We recommend sticking with the default Debian 12 and increasing the storage to at least 25GB.

- Click Select to set the storage and OS, then Create.
- The VPS may take a few minutes before it is ready. Once ready copy the external IP address provided to somewhere safe, we’ll be using this to point our domain name to the server.
Grant Support Access Details
Unlike most VPS providers additional configuration is needed to access Google Cloud VM’s over SSH. They have web access to SSH which can be useful but if you would like to have the MediaCP support team to access your server for installation or support they need to use an external SSH client. Specifically, they will need our SSH key added. Follow these steps to add it.
- Select the name of your VPS to manage it.
- Select Edit.
- Scroll down until you see SSH Keys and select Add Item.
- Paste in our MediaCP Support Key in the new field making sure to replace “mediacp-support” with your username. The username should be the start of your email. For example, [email protected] would have the username john: mediacp.net/tools/support_keys.txt.
- Select Save and note down the username for when you submit your installation request.
AWS (Amazon Web Services) is a popular hosting provider due to it’s stability and extensive features. It has a great track record of uptime and security as well as advanced features and performance. The cost is significantly higher than other VPS providers but is a premium option for businesses seeking reliable cloud hosting services.
You can use EC2 (Amazon Elastic Compute Cloud) to deploy an instance of Linux and install Media Control Panel. We have a dedicated Video Guide that you can follow here, as well as a full write up in our Blog: How to Deploy MediaCP on AWS
- Login to Namecheap
- Click on the Manage button next to your domain name

- Click on the Advanced DNS tab near the top of the page

- Click on the + ADD NEW RECORD button
- Enter the first part of your sub-domain into the Host field. For example, in relation to streaming.mediacp.net we’ll enter only “streaming” into the Host Field. When ready, press the green tick to save the changes.

- Your domain name is now ready to be used with the MediaCP


If your domain name servers are pointing to Cloudflare then you will need to add an A record within Cloudflare. It is important to not enable the proxy, since it could cause problems with access to your services.
- Login to Cloudflare
- Select the DNS item from the left side menu
- Click on +Add record
- Now fill out the following details, where “streaming” is the first part of our domain “streaming.mediacp.net”
- Type: A
- Name: streaming
- IPv4 address: (paste from vultr)
- Proxy status: (OFF) DNS only
- TTL: Auto
Installation services are typically completed within the next business day, please note this excludes weekends.
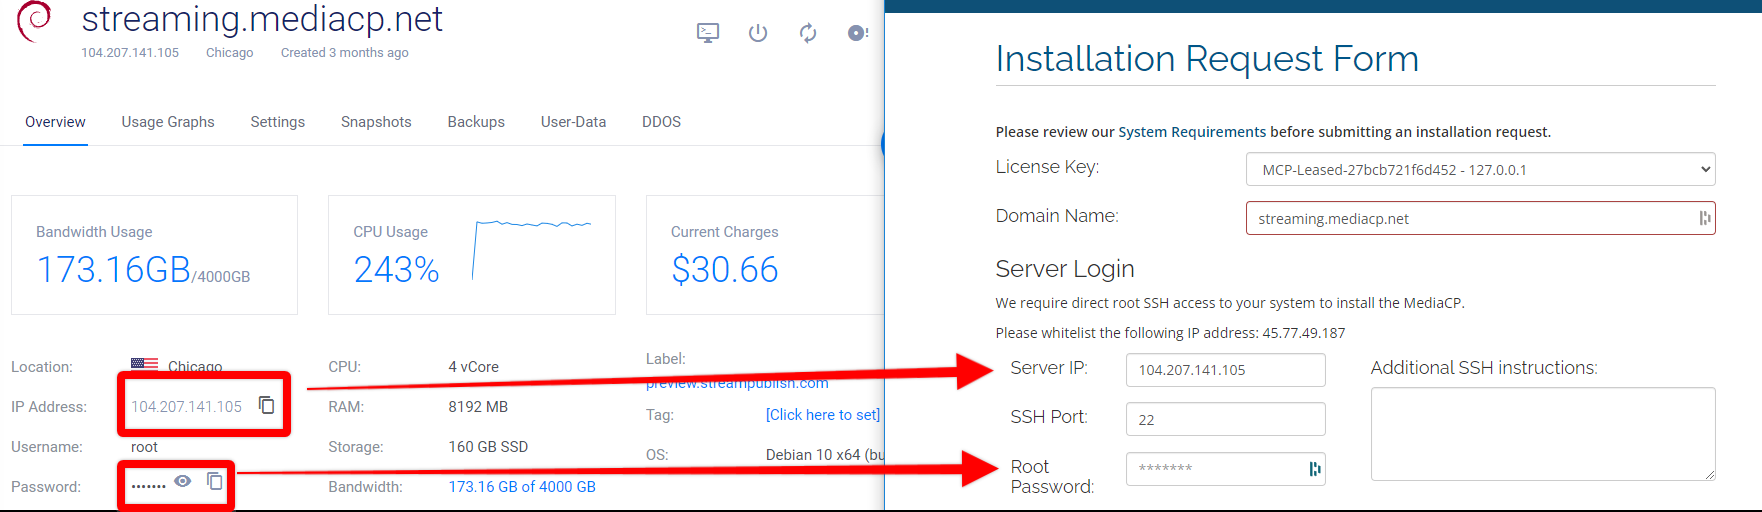
- Open the Installation Service Request Form
- Copy and paste the IP Address and Root Password from Vultr into the form as shown in the image below.

- Read and agree to the Terms & Conditions then press the Submit Installation Request.
- A ticket requesting to install the MediaCP software will now be created and you will receive an email confirmation.
- Download and install Putty for Windows
- Open Putty and enter the IP address for your new VPS into the Hostname field then press the Open button at the bottom.
- Enter the username of ‘root’ and press return.
- Enter the root password you have been provided from Vultr and press return
- Install curl in case it was not already installed by default
apt -y install curl;
- Copy and paste the following to begin the MediaCP installation process
su -c "$(curl -sSL http://install.mediacp.net)"
- Enter your MediaCP license when prompted, then press return.
- You will be presented with a list of options, enter “1” and press return to begin installation of the MediaCP
- Enter your domain name when requested, in our example we used streaming.mediacp.net
- You may be asked about installing a Video Engine, for Audio Streaming it is not required; and this guide does not cover this so enter “4” and press return which selects [4] Do not install
- The installation process will now continue and may take 15-20 minutes to install all components.
- Once completed, copy and paste the URL presented into your browser to finalise the install.
- Enter your preferred username, password, email address and timezone settings. Don’t worry, all of this can be changed at a later date also. Press save to continue.
- Continue through the prompts to complete the installation, for most users the default options are OK.